5 rendering mistakes to anticipate in 3D exterior architectural visualization

A professional visualization company always offers a review period where the clients can ask for a free revision for anything on the CGI that doesn’t meet their expectations. Unfortunately, many property developer companies are not even aware of what they should review. As a result, the review period would not be utilized optimally.

Most companies will only review the basic things such as proportionarchitectural details, and materials. Meanwhile, most rendering artists would have executed them carefully. For a sharper review, here are some common mistakes in the architectural visualization that may make the exterior CGI less impressive. Use the list as guidance when reviewing the results from the services your company invests in. You can also use the list to prevent the problems since the beginning of your contract.

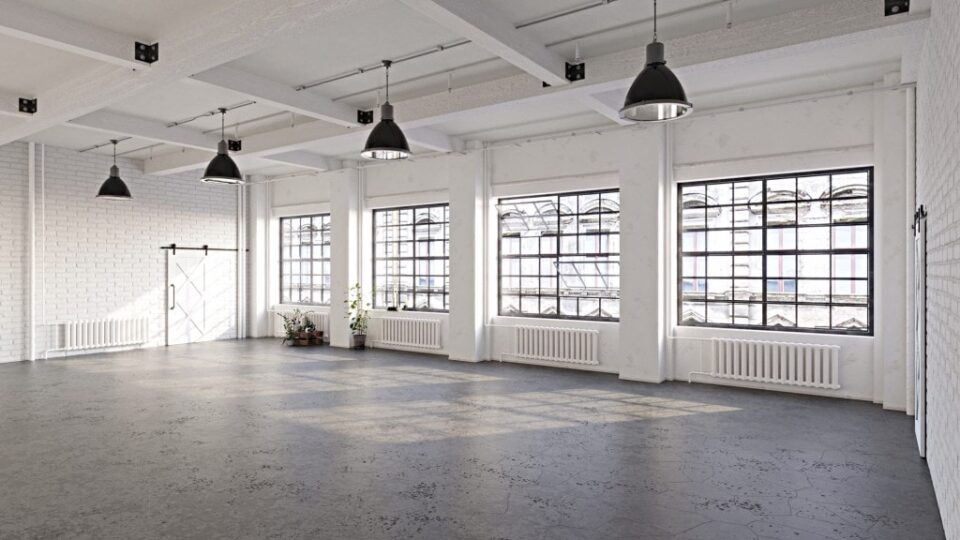
1. Unmatched ambiance

The ambiance of the architectural CGI will psychologically affect anyone who sees it, especially the people who are considering purchasing the property. By setting the right mood, the visualization will effectively convince them to seal the deal.

Sometimes the 3D artists fail to render the right atmosphere on the visualization. Unfortunately, when the scheme doesn’t match with the design concept of the property, the CGI will not be psychologically impressive. For example, imagine a secluded luxury villa by the mountain being rendered with a flashy atmosphere and too many colors. It will surely give a better feel if the rendering is set with a serene color theme.

This kind of mistake is easily preventable if you discuss the matter well with the 3D artists at the beginning of the contract. Explain the design concept and the ambiance you expect on the visualization. But even if you have done so, it is still necessary to check it again later when they deliver your final images.

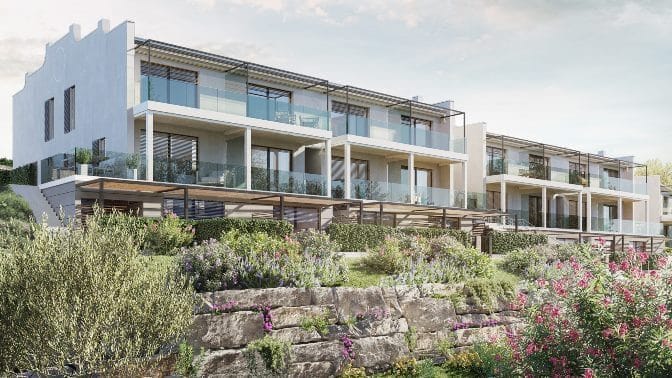
2. Wrong neighborhood

The surrounding environment may not matter for the property your company develops. Even so, don’t make it an excuse to ignore where your 3D artists put your property at. Sometimes, different environments may affect architectural images differently, especially if it is exterior visualization. For example, a hotel located on a busy road would look differently if modeled in the middle of a suburb.

Some rendering artists like using a dramatic city or sky as a background. Although it looks wonderful, these elements might steal the spotlight instead. Bear in mind that the visualization should focus on the property. Hence, a simple environment would be a better choice.

Before the 3D modeling process starts, you might want to provide complete information about the site of your property, including the photographs and the coordinate location. Although you can’t expect accurate modeling for the neighborhood, you can at least expect a similar situation.

3. Odd angle

Perspective matters a lot in property visualization. When it comes to exterior rendering, the angle chosen can be vital. The best angle to take is the one that highlights the best features of the property. However, it should also be a natural point of view.

Choosing an odd angle to render may result in an awkward look. Sometimes, it even causes a disproportionate look that ruins the perception of size. Your property CGI should be clear and comfortable to look at. It doesn’t have to be in a human’s eye level, especially if the property is a high-rise building.

If you find such a problem with your exterior architectural visualization, you should ask a revision for it. An odd-looking image will not impress anyone, which may decrease its effectiveness in your company’s marketing activity. If possible, ask your visualizer to capture the angle first for your approval before rendering it again.

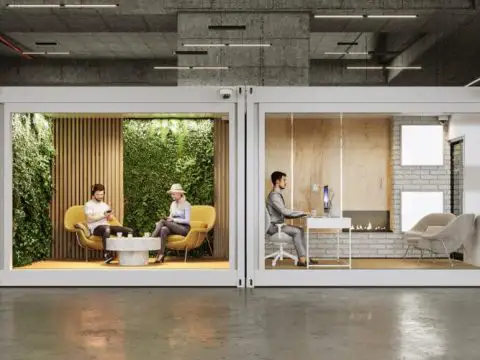
4. Awkwardly-arranged components

Besides the property itself, an architectural visualization needs some extra components to make the ambiance feel alive. These components can be a few people, cars passing by, lamps, vegetations. However, it requires a good sense to arrange all the components harmoniously. If there is any component that doesn’t support the grand theme, it may distract the whole image.

Most rendering artists use graphic images to use as templates for some of the components. These also can be problematic considering that they may have different color themes, resolution, and perspective angles. Scaling and positioning are also crucial to avoid them looking out of place. If not carefully executed, you will see that such components would fail to blend in with the whole image.

5. Unnatural refraction and reflection

Shiny materials are tricky, especially the translucent ones like glasses and water. There must be some refraction, reflection, and even glistening effect to make them look realistic. Everything should be on the right level. A glass that is too transparent or a mirror that reflects too flawlessly will make the visualization look unnatural. The light setting also contributes to the textures of these shiny materials.

Unfortunately, such kinds of materials are indeed not easy to render. There is a chance you might spot some mistakes even from an experienced visualization. If you do so, try explaining it clearly to your visualizer why the textures look odd, so they can revise those accordingly as you expect.

You can also avoid such problems to happen by looking at the company’s portfolio before deciding to hire them. At the portfolio, you can see their rendering quality, including the way they set reflection and refraction.

Many people underestimate such mistakes. Little did they know that these things can significantly affect the aesthetic of the images. If you spot these mistakes on the exterior visualization you ordered, do not hesitate to ask for a revision. Once you receive the revised version later, you will see how much it may improve the resulting quality. Your architectural CGI might be more effective in serving its purposes.

When reviewing your exterior visualization, pay attention to the overall look first. After that, change your view by taking a closer look at each element. Knowing what to anticipate can be helpful to enhance the beneficial value of the project your company invests in. Besides looking for one of the results, you can also prevent such problems from occurring in the first place by simply communicating it with the 3D rendering company you hire.

10 tricks for more effective product visualization

Product visualization is essential in the business of product development and marketing. Thanks to digital technology, product visualization is now much easier to accomplish and higher quality than it was in the past. CGI visualization is now an essential step for any product.

Nowadays, it seems like every company uses product visualization. With such popularity, it is more difficult for your products to stand out in the market. Companies require hyper-realistic product visualization with beautiful aesthetics to increase its effectiveness. Here are some tricks worth trying to reach such goals:

1. Find the right angle

Sometimes, you get a chance to show only one image to draw people’s interest in your product. Hence, you need to find the best angle to display your product. It can be the angle where all the features are visible or one where you can highlight the best features of your product. It is important to show a product’s best angles on advertising material because it is this media that will catch people’s attention first.

2. Manipulate lighting

One of the best things about CGI is that you can customize the lighting in the rendering. Photography can do this too, but it is difficult and limited. Many people do not realize it, but a clever job manipulating the lighting of a rendering can make a product look a lot more attractive. On the contrary, a poorly shaded rendering will make your product look dull. When looking for a 3D artist to provide product visualization services, observe how they arrange the spotlights and shadows in the product model.

3. Fine tune the texture

Texture is the most crucial element to make a product CGI look realistic. If possible, ask your 3D artist to avoid using common texture templates. Instead, each surface should be edited manually to mimic the feel of the actual material. This trick is especially important for tactile products like furniture or wearable goods, where the materials define the comfort and quality of the products.

4. Visualize the inner parts

If your products have layers inside that determine the quality of the product itself, you should show them off. You can make a section from a 3D model of your products and show all the layers from the side. Another trick to visualizing a product’s inner layers is by breaking it apart layer-by-layer for a clearer view of their order.

Products with mechanical or electrical engineering also look great with this kind of visualization. Such visualization helps people to realize that inner quality is far more important than the beauty of the external casing.

5. Design engineering simulation

To take a product visualization to the next level, one can make an animated visualization instead of just still images to showcase the inner parts of products. The animation can show how the parts are being arranged, or how the system runs when the product is operating. Both animations convince people that the product has clever engineering to deliver the best performance.

6. Eye-catching videos for social media

Brand recognition and public engagement are important for business. Thus, in modern times, a company or product’s social media presence is important to its success. An enjoyable video posted on your company’s social media accounts can be an effective tool to reach people. The animation could be funny, relatable, or interesting in a way that promotes your product or brand identity.

7. Bring it to augmented reality

Develop an app and allow your 3D visualization to come to life so that people can experience products through the screen of their smart device. Imagine people scanning a furniture catalog and instantly testing the suitability of different tables in the middle of their house simply through Augmented Reality. AR helps consumers get a true sense of your products and decide which one is most suitable for them.

8. Photomontage

Another way to make your product look realistic is by making a photomontage with it. Photomontage is a practice which places a product visualization rendering within a real photograph. The combination shows how the product blends into a real environment. Products that could be effective in a photomontage are furniture, vehicles, wall decor, and many more.

9. 360 View

Do not waste the 3D modeling that your visualization artist has created. Instead, make a 360 view on your website where people can tilt and rotate the model any way they like. Zoom features can be added to enhance the experience. Interactive features like this on your website can increase engagement, leading to sales generation.

10. Interactive customization

It’s beneficial to include a feature on your website where customers are free to customize your products any way they like. Customization option may include choice of color, design patterns, material and more. Interactive customization is an especially effective marketing tool for customizable goods like merchandise and fashion apparel. If possible, combine the feature with a 360 view to enhance the experience. Your products and brand will appear more attractive and credible to consumers.

When executed nicely, product visualization can bring huge benefits to your business. The more effort and creativity you put in it, the better benefits your company may receive. Therefore, it is important to hire the best 3D visualization company to create a CGI visualization of your products.

With our many years of dedication and experience in the product visualization field, we are confident that we can deliver you the visualization that makes your product stand out from its competitors. We can even make suggestions on what kind of visualizations to offer which will suit your business goal the most.

6 elements to determine the quality of interior visualization

To get the best quality for an interior visualization, it is highly advisable to hire a professional company or team to create the visualization. There may be a higher initial cost, however that investment amounts to tremendous benefits. 3D Modeling and rendering can be complicated to execute. There are many things that an inexperienced, non-professional visualizer may miss in the process.

Evaluating your interior visualization decision

Even if you have signed a contract with the best CGI company, it is still important to know what defines the quality of an interior CGI rendering. Here is some important information to have when evaluating your interior visualization decision:

1. Survey

Before choosing a 3D rendering company to create your interior visualization, it is essential to survey all the candidates. One must examine each company’s portfolio to see their skills in CGI visualization. While surveying, it is advisable to see how they execute each element of a rendering. The more elements they visualize successfully, the more reliable they could be for your project.

2. Result review

At the end of a contract, you will receive the final images and videos you ordered for the interior visualization. Most professional companies usually offer free revision as a form of accountability to their work. When one receives the final images, it is essential to review them thoroughly and carefully to spot any imperfections to revise. If you do not know what elements should be paid attention to, it would be difficult for you to take advantage of the revision period optimally.

Visualization might be difficult to perform. Fortunately, it is not difficult to review it. One can ensure their 3D renderer executes each element in a scene of interior visualization.

Here is a list of important elements to pay attention to during any interior visualization review…

1. Material textures

The texture of the materials is the first thing one should pay attention to when reviewing a CGI rendering. Even an image of an empty room should have proper textures on every surface to make it look realistic.

Glass windows, steel frames, and ceramic floors are shiny, but light reflects differently off each material. In a rendering, a cushioned sofa or soft rug can communicate how comfortable they are merely through use of the proper graphical texture. Your 3D renderer should know how to texturize each type of material, otherwise your interior scene could end up looking unnatural.

2. Lighting and shadows

Lighting is a crucial part of any interior design. Thus, it must be executed perfectly in any interior visualization. Adjusting brightness and shadows is not an easy job, especially if the room has multiple sources of light. Impeccably rendered lighting can truly enhance the visualization of different elements from an interior design such as a reading nook in a corner or a night lamp in the backyard.

If you wish to have a beautiful lighting design for your interior visualization, make sure to find a 3D renderer who knows how to visualize it realistically. Be sure to pay close attention to lighting details while reviewing the portfolio of any 3D visualization company.

3. Measurement and proportion

One of the main purposes of interior visualization is to show the function and comfort of a room. Accurate measurements and proportions of a design shows people exactly how the room would serve its function. Components that appear unfit or disproportioned will make the entire scene look awkward.

A professional visualizer will measure every single component in a design. Even the smallest ornaments like plates on a table or a doorknob should be the correct size to make the room look realistic.

4. Theme and style

An interior scene should have a consistent design direction to deliver harmonious unity. The design direction should be applied to all the components in the room. On the other hand, conflicting elements would make the interior look awkward and unpleasant to look at.

All the furniture in the room should be of the same style. For example, a fluffy sofa set would not match an industrial-style coffee table. Color tones matter too. An interior visualization needs to have a consistent color palette that goes well with the style of the interior design.

5. Supporting components

Besides the essential furniture, your 3D artist should add little details to make the room look realistic. These components should be in sync with the grand theme. For example, an industrial-style living room would look nice with a dart board on the wall instead of a contemporary painting.

The more professional the artist, the more attention they will pay to these little details. A professional artist might even place a coffee cup on the table with thin smoke rising to add ambiance to an office scene. Visualization companies already have stocks of these graphic components, so they just need to add what matches with the theme of the design.

6. Rendering angle

When all the components are well-positioned and the elements are all set properly, it is time to perform a final render. The angle the visualizer takes for the final images greatly affect the quality of the final result. Capturing the right angles becomes even more complex when creating an animated video.

A bird’s-eye view may be nice to show the room layout, while a human-eye level shows its practicality and function. The location and direction of the selected angle will also communicate different feelings. For example, selecting a rendering angle too close to a large desk would make the desk surface dominate the scene creating a false sense of compactness in the scene.

Looking at the big picture is not enough, because the beauty of interior visualization lies in little details in every corner. Even if only one element in a rendering is poorly-executed, it still may ruin the beauty of the other elements.

Do not hesitate to contact us for any interior visualization needs. Our team has skill and experience in the field, and a high standard of quality on every service we deliver.

The benefits of virtual aerial tour for architectural visualization

The development of digital technology has been making property visualization look more and more alive. From 3D images, the rendering has now presented the property through an animated video. This new method is popular by the name of Virtual Tour.

Instead of a walkthrough tour on a human’s eye level, the newest trend is to see it from up above in a bird’s eye level. The rendering usually takes on the 45° to 60° of an angle from the height. It is the most convenient perspective to get a better look at the property in a three-dimensional way.

Virtual Aerial Tour becomes a new choice to use as marketing CGI due to its promising benefits that are far better than the regular visualization, such as:

Easily catch attention

Get your aerial virtual tour embed on the main page of your company’s website or post it on social media. Use a large screen in your marketing gallery to run the video continuously. It can be a very effective tool to get people’s attention. The latest technology is beneficial to impress people. A virtual aerial tour can attract more people to visit your website. Even people who are not considering buying a property will stay for a while to take a look.

Building brand recognition would be more lenient with so many people looking out the property you offer. Combined with a terrific architectural design and smooth rendering presentation, your 3D animation will deliver the best results for your company’s business.

Getting ahead of competition

Standing out of your competitors gets harder because every company uses digital rendering for its architectural visualization. You can hire a better 3D artist to get more excellent quality. But, it won’t give you a better boost than a virtual aerial tour.

This animated technique is still rather new. Only a few companies have started using it. Some even are still in basic qualities. Presenting your property in a high-quality bird’s eye view animation would be impressive. The public will see your property as better products than any other ones in the market.

Better sense of professionalism

When you constantly use aerial tours for all the property your company develops, eventually it will get a great reputation. People will remember your company as the one who goes all out to deliver the best.

Not only prospective buyers, but this kind of presentation would also impress investors. Aerial tours require higher investment. As you are willing to take it, investors will see your company as bold and brave in going all out to aim higher than others. It is such a promising trait that could bring success in running a business. With more trust from investors, it would be much easier for your company to grow. There would also be more accessible to other resources and opportunities.

Memorable experience

3D rendering visualization gives people experience with the property before they decide to own it, and even before the construction started yet. And an aerial tour can take the activity on a whole new different level. A bird’s eye view is not the angle that people commonly see. Having a thorough tour of this perspective would give a new kind of experience.

Visualization can affect people psychologically. If it is impressive, people will feel engaged with the property. Thus, they will more likely want to own one. With the unique aerial tour, they would feel something they never did before. The memorable experience would not easily allow them to move on. Such kind of animated presentation can be effectively convincing.

More brilliance to show off

When designing a property, architects always execute every detail carefully. Yet unfortunately, there are many parts of the buildings that are not commonly visible. An aerial view offers a clever solution to such a problem. With its different perspective, the digital tour will show some sides and corners of the property that people don’t usually see.

It is a golden opportunity to show more architectural brilliance in the property design. With more wonderful things to highlight, the property will amaze people more deeply. It gives out ideas they have never considered before.

A better look of situation

How the property blends in with the environment can be an important factor for people to consider. No other forms of property visualization can show this matter better than a virtual aerial tour does. As you are seeing it up from above, you can see the whole building and the surrounding area at one clear look.

This benefit allows people a clearer way to imagine how it would feel to live or have activìties in the property. Architects and property developers can also review the design more clearly. Many vital aspects of the property should be in sync with the environment, such as circulation, the positions of windows and glass walls, and the aesthetic value itself.

More opportunity for interaction

Make the virtual tour on your website clickable. Allow people to fly through in the direction and angle as they wish by navigating it using their mouses. You can also get the digital file applied to be a virtual reality tour to make the experience more realistic for your customers. There are also many other ways to transform your 3D rendering file into an interactive digital presentation to feature on your company’s website.

Interaction gives a deeper impression for people, which makes the experience even more imposing for them. This feature will enhance all the benefits mentioned above, which of course, may result in even more satisfying returns of the investment. However, such a digital project may cost fairly higher.

A virtual aerial tour is more convincing than any other means of architectural presentation. With a clever investment strategy, your company would efficiently generate more sales and achieve higher in the business. The next thing you should know is how to make a good investment in this kind of 3D rendering and how to utilize the tour video well, so your company can optimize the benefits from this visualization project.